![[PukiWiki] [PukiWiki]](image/bc_logo.png)
![[PukiWiki] [PukiWiki]](image/bc_logo.png)
labs.beatcraft.com
BC-USB-Kit
BC-USB-Kit/Tutorials
This document is an introduction of PIC programming. To use BC-USB~Kit, this explains the basics of PIC programming. Please consider this to be kind of PIC Programming 101 or PIC for Dummy.
To follow the great tradition of programming on electronic works (electronic hobby), this article shows how to light up the LED.
To read and follow this article,
please install MPLAB X IDE.
# In this article, MPLAB XIDE v2.35 is installed on Mac OS X (10.10.3).
- Download bc_usbkit_pic24f.zip, and expand the zip file in any directory you wish for.
To write a program for BC-USB-Kit effortlessly, this file contains the information, which is specifically set up for BC-USB-Kit, including the clock frequency and other default settings and functions for setting the button and LED of BC-USB-Kit.
Select "New Project" form "File" at the menu bar.
Please select "Microchip Embedded" form "Categories" and “Standalone Project” from "Project."
Then, click the Next button.
Choose 16-bit MCUs (PIC24) from the pull down menu at Family, and select PIC24FJ128GB202 from the pull down menu at Device. Then, click the Next button.
Select "PICKit3."
Choose "X16."
Type in “LED_Test” at Project Name, and select “UTF-8” at Encoding. Then, click “Finish”
If “LED_Test” appears on the left pane, the new project is created without any issues.
To click the right-side button (for Mac OS X, click with the two-finger) on “Source File,” please select “New” from the pop-up menu. Then, choose “C Main File,,,” from the sub-menu.
Type in “main” at File Name. Then, click the Finish button.
Then, main.c is added into Source Files.
Click the hammer (build) icon, Then, if “BUILD SUCCESSFUL,” which are written in green, appears in Output tab at the bottom pane, the build process is succeeded.
Open “Project Properties” from File at the menu bar.
Select "xc16-gcc" from the list of Categories in the left pane.
At Option categories, select “Preprocessing and message” and add the path of "bc_usbkit_pic24f" to "C include dirs."
To click the right-side button (for Mac OS X, click with the two-finger) on “Source File,” please select “Add Existing Items form Folders” from the pop-up menu. Then, add "bc_usbkit_pic24f."
If "bc_usbkit_pic24f" is located under Source Files, it is successfully added.
To include a header file, please add a line of code shown below to main.c.#include <system.h>
Then, click the icon of a broom on a hammer (Clean and build)
If “BUILD SUCCESSFUL, which are written in green, appears in Output tab at the bottom pane, the build process is succeeded.
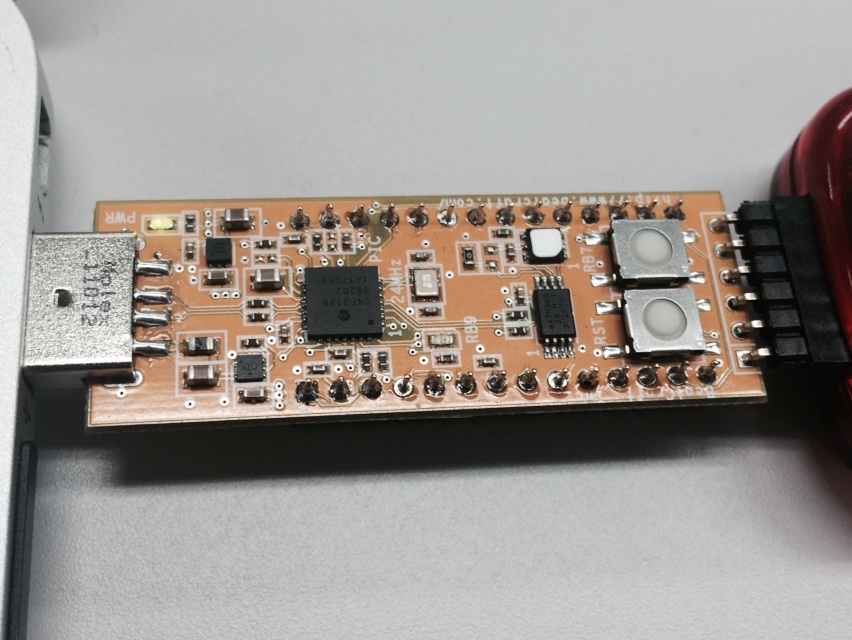
As shown in the picture below, please connect BC-USB-Kit with PICKit 3.
# The power of BC-USB-Kit is supplied from the right-side USB port of the MacBook Air.
Please add two lines of code shown below to main.c.
SYSTEM_Initialize(SYSTEM_STATE_START);
LED_On(LED_D1);
The contents of main,c file are organized as such as shown below.
Click the icon of a broom on a hammer (Clean and build).
Then, click the icon of the right faced green triangle (Run Main Project), which is located next to click the icon of a broom on a hammer (Clean and build)
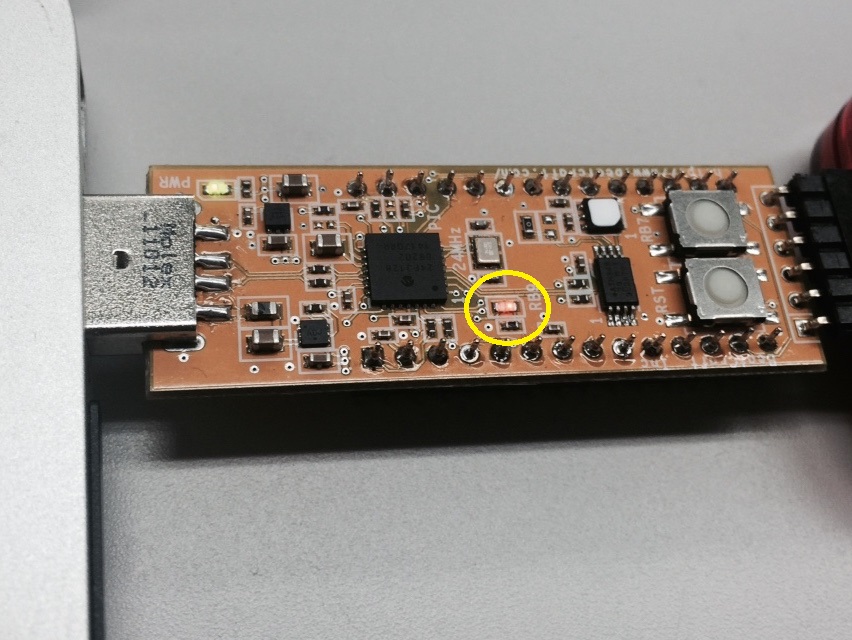
If the LED is lightened in orange, the main project runs successfully.
 →
→ 
- 2015-04-22 This article is initially published.